There was a time in my life when Friday nights meant one thing: a massive basket of deep-fried, beer-battered onion rings from the local diner, washed down with a sugary soda. I loved the crunch, but my body did not. A few years ago, when I committed to a healthier lifestyle to shed stubborn weight and reclaim my energy, I thought those indulgent, crispy textures were gone forever. For months, I struggled through bland salads and soft, uninspired vegetable sides. I missed the distinct, satisfying snap of a real chip. Giving up processed carbs and gluten felt great for my waistline—I ultimately lost over 40 pounds—but my cravings for savory, crunchy finger foods never truly went away.
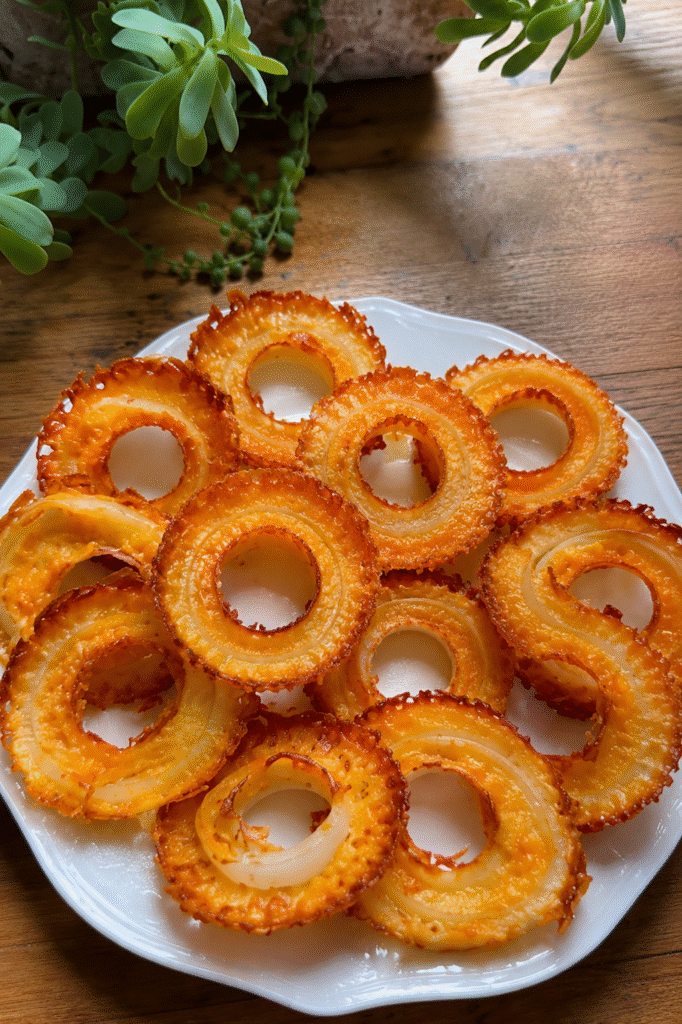
That was until I experimented with this viral culinary miracle: the 2 ingredient crispy onion ring chips.
When I first heard about making low carb healthy onion rings using just fresh onions and cheese, I was highly skeptical. I assumed they would either turn into a soggy, sweet mess or a burnt, bitter sheet of dairy. But after tweaking the baking temperatures, mastering the thickness of the slice, and testing different variations of cheese, I finally cracked the code. These chips are an absolute game-changer. They deliver that exact, deeply nostalgic, savory crunch of a traditional fried onion ring, but without a single speck of white flour, cornstarch, or inflammatory seed oils.
Whether you are strictly following a ketogenic lifestyle, managing a gluten intolerance, or just looking for a wholesome alternative to processed potato chips, this recipe will completely transform your snacking habits. It has become my absolute favorite weekly meal-prep hack because it satisfies my deep-fried cravings instantly while keeping my health goals perfectly on track. Let’s dive into how you can recreate this crispy, golden-brown magic right in your own kitchen.

Why You’ll Love This Recipe
- Unbelievably Low in Carbs: Clocking in at just 1 gram of net carbs per serving, it is the ultimate guilt-free snack for keto and low-carb diets.
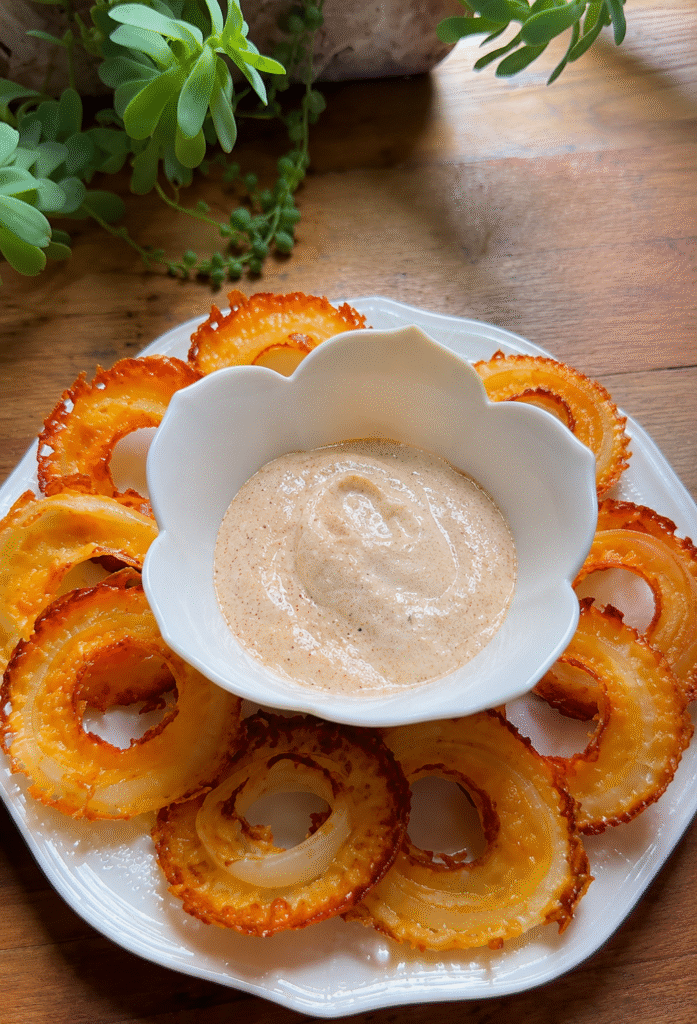
- Genuinely Crispy Texture: By leveraging the natural fats and proteins of cheese, we create a shattered-glass texture that rivals any deep-fried alternative.
- No Messy Frying: Say goodbye to splattering pots of hot oil and the lingering smell of grease in your house. This is entirely oven-baked (or air-fried!).
- Just Two Base Ingredients: Requiring only an onion and a bag of cheese, it is incredibly budget-friendly and requires zero exotic pantry staples.
- Highly Customizable: While delicious on its own, this recipe acts as a blank canvas for your favorite seasonings, from spicy cajun to smoky BBQ.
Key Ingredients
- Finely Shredded Parmesan: Melts uniformly to create a lacey, ultra-crisp, low-carb outer shell.
- Medium Brown Onion: Yields sharp, sweet, and classic caramelized onion flavor notes beautifully.

How to Make It: Step-by-Step Instructions
Step 1: Slice with Precision
Preheat your oven to 350°F (177°C). Line a large, heavy-duty baking sheet with premium parchment paper. Take your medium brown onion and peel away the papery outer layers. Using a sharp mandoline slicer set strictly to 1/8-inch thickness, carefully slice the onion. Slicing them this thin ensures the natural moisture evaporates rapidly during baking, preventing the final chips from becoming soggy. Place the slices on a layer of paper towels and pat them firmly to remove any excess surface moisture. Separated the slices into individual rings.
Step 2: Lay the Cheesy Foundation
Take 1.5 cups of your finely shredded parmesan cheese and spread it across the parchment paper into a thin, completely even rectangle. You want the layer to be consistently distributed without any gaping holes. This ensures that as the cheese melts, it fuses into a singular, solid sheet that can easily be lifted and manipulated later.
Step 3: Arrange and Double-Coat
Place your thin onion rings directly on top of the bed of parmesan cheese. You can position them close together to maximize space, but make sure they do not overlap, as overlapping onions will trap steam. Once arranged, take the remaining 1/2 cup of parmesan cheese and sprinkle it meticulously over the top of each onion ring. This top layer locks the onion in place and guarantees a double-sided crunch.
Step 4: The Initial Golden Bake
Slide the baking sheet into the middle rack of your preheated oven. Bake for 30 to 35 minutes. Keep a very close eye on the oven around the 20-minute mark, as oven calibration varies and parmesan can turn from golden to burnt quickly. You are looking for the edges to turn a deep golden-brown and for the bubbling in the center to slow down significantly.
Step 5: The Masterful Flip
Remove the pan from the oven, but leave the heat turned on. Let the sheet sit undisturbed for 5 to 10 minutes. As it cools slightly, the cheese will firm up and become structurally sound. Using a wide spatula or your hands, carefully flip the entire sheet (or large sections of it) upside down. You will notice the underside has a few pale spots. Pop the pan back into the oven for an additional 3 to 5 minutes to perfectly crisp up those remaining pale sections.
Step 6: Cool, Snap, and Serve
Remove from the oven and let it cool completely for 10 minutes on a wire rack. As it reaches room temperature, the cheese will transform into a completely rigid, brittle state. Use food-safe kitchen shears or your hands to break the sheet into individual, chip-sized onion rings. Serve immediately with a side of low-carb ranch or keto marinara sauce!
Storage
- To Store: Allow the onion chips to cool entirely to room temperature. Placing warm chips in a container creates condensation, which instantly destroys the crunch. Store them in an airtight glass container lined with a dry paper towel in the refrigerator for up to 5 days.
- To Reheat: Never use a microwave, as it will yield a limp, oily texture. To restore their original shattered-glass crunch, pop them into an Air Fryer at 320°F (160°C) for 2 to 3 minutes, or lay them on a baking sheet in a 350°F oven for 4 minutes.
Frequently Asked Questions
Why did my onion ring chips turn out soggy instead of crispy?
The number one culprit for soggy onion chips is moisture. If your onion slices are thicker than 1/8-inch, they will release too much water as they bake, steaming the cheese instead of roasting it. Always make sure to pat your sliced onions completely dry with paper towels before assembling the dish on the baking sheet.
Can I use pre-grated parmesan cheese from a green shaker can?
No, do not use powdered or shaker-can parmesan cheese. Those products contain anti-caking agents (like cellulose) designed to stop the cheese from clumping. Because of this, it will not melt together smoothly into a unified sheet. For the best results, use store-bought finely shredded parmesan or grate a fresh block of Parmigiano-Reggiano at home using a microplane.
What variations can I add to change the flavor profile?
This recipe is incredibly versatile! Before baking, you can sprinkle the top layer of cheese with garlic powder, smoked paprika, chili powder, taco seasoning, or dried Italian herbs. For a kick of heat, a tiny pinch of cayenne pepper or cracked black pepper pairs beautifully with the sharpness of the parmesan.
Can I make these using a different type of cheese like Cheddar or Mozzarella?
While you can use sharp cheddar or pepper jack, keep in mind that these cheeses have a much higher fat-to-protein ratio than parmesan. They will release a significant amount of oil during the baking process, requiring a slightly longer cooling period to fully crisp up. Avoid low-moisture mozzarella, as it melts into a chewy, stretchy texture rather than a brittle chip.
Is this recipe safe for diabetic and ketogenic diets?
Yes! Because this recipe completely omits flour, starch, and grains, it does not cause blood sugar spikes. It relies entirely on the healthy fats and clean proteins found in high-quality cheese, making it 100% compliant with keto, low-carb, diabetic, and gluten-free dietary lifestyles.

Try These Recipes Also
Crispy Zero Carb Chicken Fries
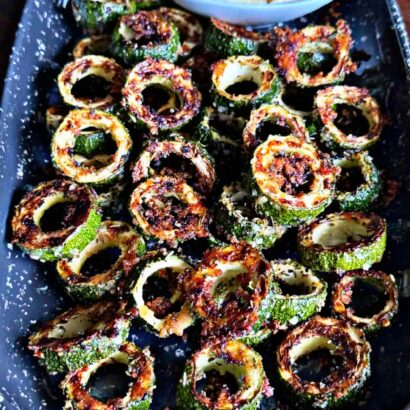
Crispy Parmesan Zucchini Rings
2-Ingredient Crispy Onion Ring Chips (Keto & Low Carb)
Ingredients
1 medium brown onion (peeled)
2 cups finely shredded Parmesan cheese (divided into 1.5 cups and 0.5 cup)
Instructions
- Preparation and Precision Slicing
To begin, preheat your oven to 350°F (177°C) and ensure the oven rack is positioned directly in the middle slot. Prepare a large, heavy-duty baking sheet by lining it flat with a high-quality sheet of parchment paper. Take your peeled brown onion and secure it firmly against a mandoline slicer set strictly to 1/8-inch thickness, running it downward carefully to create perfectly uniform, paper-thin rounds. If you do not have a mandoline, use a sharpened chef’s knife to slice the onion as thinly and evenly as humanly possible. Transfer these raw slices onto a thick double-layer of paper towels, spreading them out completely flat. Take another paper towel and press down firmly across the tops of the slices to absorb all accessible surface water, which is a vital step to prevent the cheese from steaming into a soggy mess later. Once dried, gently use your fingers to separate the concentric rounds into individual, singular onion rings.
- Building the Cheese Base and Assembly
Take 1.5 cups of the finely shredded Parmesan cheese and scatter it across your lined baking sheet, spreading it gently with your fingers or a spatula to form a thin, completely uniform rectangle. Ensure there are no large gaps or bare patches in the cheese layer so that it melts down into a single, cohesive structural sheet. Next, arrange your dried, thin onion rings in rows directly on top of this bed of cheese. Place them close together to maximize the real estate of your baking sheet, but verify that absolutely none of the onion rings overlap, as overlapping boundaries will trap unwanted moisture. Once your layout is complete, take the remaining 0.5 cup of shredded Parmesan cheese and sprinkle it meticulously over the top of each onion ring, essentially locking the vegetables in a dual-sided pocket of cheese that guarantees an even, uniform crunch on both sides.
- The Double-Bake and The Perfect Flip
Slide the prepared baking sheet into the center of your preheated oven and bake undisturbed for 30 to 35 minutes. Keep a vigilant eye on the oven progress after the 20-minute mark, as individual oven calibrations vary and high-protein cheese can transition from perfectly caramelized to bitterly burnt within a sixty-second window. You will know it is ready for the next step when the outer perimeter edges turn a deep, uniform golden-brown and the heavy bubbling in the center of the cheese sheet slows down significantly. Carefully remove the baking sheet from the oven, leaving the oven heat turned on. Let the pan rest undisturbed on your counter for 5 to 10 minutes; as the temperature drops slightly, the proteins in the cheese will begin to lock and solidify, giving the sheet the structural integrity it needs to be flipped. Using a very wide spatula, or your hands if you are comfortable, confidently flip the entire sheet (or break it gently into two large halves to flip if that is easier) completely upside down. You will notice the newly exposed underside contains a few slightly pale patches, so return the sheet immediately to the oven for a final 3 to 5 minutes to crisp up those remaining spots to absolute golden perfection.
- Cooling and Shatter-Snapping
Remove the baking sheet from the oven and carefully slide the entire parchment paper sheet off the hot metal tray and onto a wire cooling rack. Let the baked sheet cool completely at room temperature for a full 10 minutes. As it cools, the melted cheese will undergo a structural shift, transforming from a pliable, flexible texture into a completely rigid, brittle, and glass-like state. Once it is completely cold to the touch, use clean kitchen shears or simply your bare hands to snap and break the unified sheet along the natural borders of the onion rings, creating individual, bite-sized chips. Serve them immediately while they are at their maximum crunch levels alongside your favorite low-carb dipping sauce.
Notes
The Moisture Rule: Onions are naturally loaded with water. If your chips are bending instead of snapping, it means the onions released too much moisture while baking. Next time, cut them even thinner and spend an extra minute pressing them with paper towels before assembling. The Cellulose Trap: Always purchase bags of finely shredded parmesan or grate a block yourself. Never use the dry, shelf-stable grated parmesan powder found in standard ambient grocery aisles, as it will not melt down or fuse into a singular sheet. The Cooling Grace Period: Do not rush the cooling step! The absolute magic of the shattered-glass texture happens during the 10-minute resting window outside of the oven. If you attempt to break or eat them while they are still warm, they will feel soft and greasy.