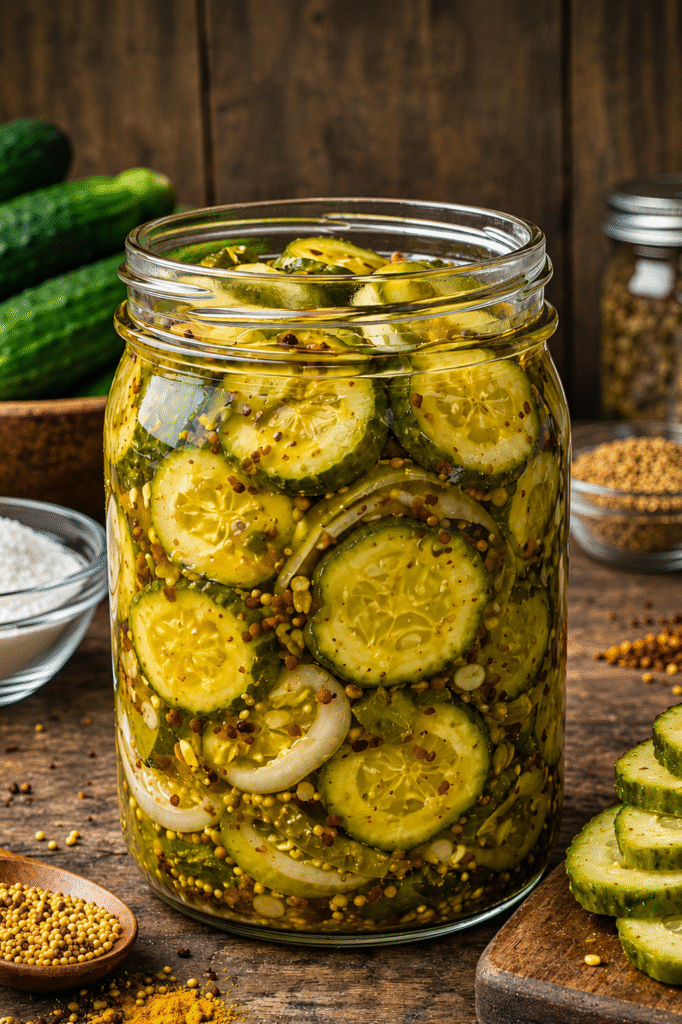
If you’ve ever looked at a jar of bread and butter pickles and thought, “These taste amazing, but why do they contain so much sugar?” you’re not alone.
Traditional bread and butter pickles are famous for their sweet, tangy flavor, but most store-bought versions are loaded with sugar. In fact, some brands contain more sugar than many desserts. That’s not ideal if you’re following a keto lifestyle, reducing carbs, managing blood sugar, or simply trying to eat healthier.
That’s where these Sugar Free Bread and Butter Pickles come in.
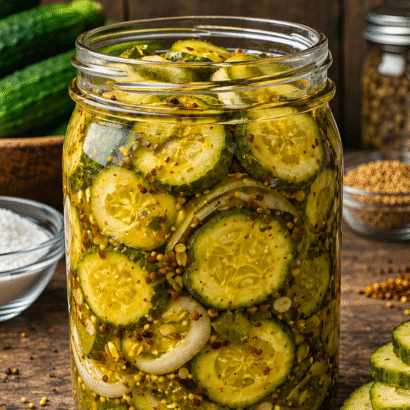
They deliver everything you love about classic bread and butter pickles: the perfect balance of sweetness and tanginess, crisp cucumber slices, and that nostalgic homemade flavor. The difference is that this version uses a sugar-free sweetener instead of traditional sugar, making them low-carb, keto-friendly, and much more blood sugar friendly.
The best part? They’re surprisingly easy to make. You don’t need advanced canning skills or special equipment. With a handful of simple ingredients and a little patience while the flavors develop, you’ll have homemade pickles that taste even better than many store-bought brands.
Whether you’re topping burgers, adding crunch to sandwiches, serving them on charcuterie boards, or enjoying them straight from the jar, these homemade sugar free bread and butter pickles are guaranteed to become a staple in your refrigerator.

Why You’ll Love This Recipe
- Authentic Old-Fashioned Flavor: Captures the perfect balance of sweet, tangy, and spiced notes without a trace of refined cane sugar.
- Guaranteed Maximum Crispness: Our signature ice-salting technique draws out internal water so the cucumber rounds stay satisfyingly crunchy.
- 100% Keto and Diabetics Safe: Swapping out corn syrup brings the net impact down to practically zero carbs per serving.
- No Specialized Canning Gear Needed: This recipe works beautifully as an easy refrigerator pickle, saving you from boiling giant pots of water.
- Clean, Whole-Food Ingredients: Completely free of yellow food dyes, corn syrup, chemical preservatives, or artificial flavor enhancers.
Key Ingredients
- Kirby Pickling Cucumbers: Provide the firm, thick-skinned, and crunchy vegetable foundation.
- Sweet Vidalia Onion: Introduces a mild, fragrant, and savory aromatic crunch.
- Pickling Salt: Draws out internal vegetable moisture without clouding the liquid.
- Allulose Sweetener Blend: Mimics real sugar syrup body without any chemical aftertaste.
- Apple Cider Vinegar: Delivers a fruity, deep, and robust tangy acid baseline.
- White Distilled Vinegar: Provides a clean, sharp, and preserving sour punch.
- Yellow Mustard Seeds: Inject a classic, pungent, and earthy pop of spice.
- Celery Seeds: Offer a concentrated, rustic, and herbal aromatic warmth.
- Ground Turmeric: Imparts that iconic, vibrant golden-yellow deli color profile.
- Crushed Ice: Rapidly chills the vegetables to lock in cellular crispness.

How to Make This Sugar Free Bread and Butter Pickles
Step 1: Slice and Prep the Vegetables
Thoroughly wash 2 pounds of fresh, firm pickling cucumbers in cold water. Using a sharp knife or a mandoline slicer, cut the cucumbers into uniform 1/4-inch thick rounds. Pro Tip: Always slice off and discard the very tips of both ends of the cucumbers! The blossom end contains natural enzymes that will soften the cucumber and make your pickles mushy. Slice 1 large Vidalia onion into thin half-moon strips.
Step 2: The Ice and Salt Purge
In a large ceramic or glass bowl, combine the sliced cucumbers and onions. Sprinkle 3 tablespoons of pickling salt evenly over the vegetables, using your hands to toss them until every piece is coated. Cover the entire top of the vegetables with 2 to 3 inches of crushed ice. Place the bowl in your refrigerator for a full 3 hours. This step is mandatory; the salt pulls out the excess water that makes pickles soggy, while the heavy ice shocks the cell walls to keep them firm.
Step 3: Rinse and Dry Thoroughly
After 3 hours, dump the contents of the bowl into a large colander in your sink. Let the melted ice and salty water drain away completely. Rinse the cucumber and onion slices thoroughly under cold running water to wash away the excess exterior salt. Once rinsed, spread the slices out flat across a clean kitchen towel and pat them completely dry.
Step 4: Simmer the Sugar-Free Brine
In a large, non-reactive stainless steel saucepan, combine 1 cup of apple cider vinegar, 1/2 cup of white distilled vinegar, 1.5 cups of your granulated allulose or monk fruit sweetener blend, 2 teaspoons of yellow mustard seeds, 1 teaspoon of celery seeds, and 1/2 teaspoon of ground turmeric. Bring the mixture to a gentle boil over medium-high heat, stirring continuously until the sweetener crystals dissolve completely into a clear, golden syrup.
Step 5: The Quick Heat Bath
Add the thoroughly drained cucumber and onion slices directly into the boiling brine. Stir gently with a silicone spatula to coat the vegetables. Bring the pot back up to a simmer for exactly 2 minutes. Do not cook them any longer! You want the cucumber rounds to absorb the hot spices and change color from bright green to an olive-drab hue without actually cooking through or losing their bite.
Step 6: Pack the Jars
Remove the saucepan from the heat source. Using a slotted spoon, pack the hot cucumber and onion slices firmly into clean, sterilized pint-sized glass mason jars. Once the jars are packed with vegetables, carefully pour the hot pickling brine over the top using a funnel, ensuring the liquid completely submerges the cucumbers. Leave 1/2 inch of empty headspace at the top of the jar, screw the lids on tightly, and let them cool to room temperature on your counter before moving them to the fridge.
Pro Tips for Best Recipe
Avoid Table Salt: Never swap out pickling salt for standard iodized table salt. Table salt contains anti-caking chemicals and added iodine that will dissolve into your brine, turning your pickle liquid gray, murky, and unappealing.
Choose the Right Sweetener: Avoid using pure erythritol for this brine. Erythritol has a tendency to recrystallize when stored in cold temperatures, which will leave gritty, white crunchy shards all over your pickles. Allulose or an allulose-monk fruit blend stays perfectly liquid when chilled.
Stick to Pickling Varieties: Do not use large English cucumbers or regular salad cucumbers from the supermarket. They have thin skins and massive, watery seed pockets that collapse during the brining process, yielding soft, waterlogged pickles instead of a clean snap.
The Maturity Waiting Period: While you can technically eat these pickles the moment they cool down, resist the urge! Letting the sealed jars sit undisturbed in the back of your refrigerator for at least 48 hours allows the vinegar and celery spices to fully mature into the core of the cucumber.

Storage
- To Store: Keep your jars stored in the coldest part of your refrigerator. Because this is a quick refrigerator method rather than a high-pressure hot-water bath canning technique, these pickles must remain chilled. They will keep their incredible flavor and signature crunch for up to 3 months.
- Freezing Warning: Never freeze homemade pickles. Freezing forces the water inside the cucumber cells to expand and burst, which completely destroys the crisp texture and turns the vegetables into an unappealing, mushy mess upon thawing.
Frequently Asked Questions
Why did my pickles turn out soft instead of crunchy?
This is caused by skipping the ice-salting step or leaving the blossom ends on the cucumbers. The salt and ice work together to purge excess water from the vegetable tissues. If you skip this, that internal water dilutes the brine and softens the pickle texture.
Can I use this recipe for long-term pantry storage?
This specific recipe layout is optimized for quick refrigerator storage. If you want to store them on a room-temperature pantry shelf for up to a year, you must process the filled jars in a boiling water bath canner for 10 minutes following standard USDA home canning safety guidelines.
Is the turmeric necessary?
The turmeric doesn’t add an overpowering flavor, but it is responsible for giving bread and butter pickles their iconic, bright, golden deli appearance. Without it, your pickles will look pale and slightly gray.
Can I add a little heat to this recipe?
Absolutely! If you like a sweet-and-spicy flavor profile, simply drop 1/2 teaspoon of dried crushed red pepper flakes or a few fresh jalapeno slices directly into the brine while it simmers.

Easy Sugar Free Bread and Butter Pickles Recipe (Extra Crunchy!)
Ingredients
- The Crisping Layer
2 lbs fresh Kirby pickling cucumbers (washed and sliced into 1/4-inch rounds)
1 large sweet Vidalia onion (sliced into thin half-moons)
3 tbsp pure pickling salt (do not use iodized table salt)
4 cups crushed ice
- The Sweet Pickling Brine
1 cup raw apple cider vinegar
½ cup white distilled vinegar
1½ cups granulated allulose sweetener blend
2 tsp whole yellow mustard seeds
1 tsp whole celery seeds
½ tsp ground turmeric
Instructions
Slice off and discard both tips of every cucumber. Use a mandoline or sharp chef’s knife to slice the remaining cucumbers into uniform 1/4-inch thick rounds.
Toss the cucumber and onion slices with the pickling salt in a large glass bowl. Pack a dense 2-inch layer of crushed ice completely over the top of the vegetables. Refrigerate for 3 hours.
Dump the chilled vegetables into a colander, letting the melted ice liquid drain out. Rinse the slices thoroughly under cold running water to remove surface salt, then pat them dry with a towel.
In a large stainless steel saucepan, whisk together the apple cider vinegar, white vinegar, allulose sweetener, mustard seeds, celery seeds, and turmeric. Bring to a boil over medium-high heat until clear.
Drop the dried cucumbers and onions into the boiling brine. Stir gently and allow the mixture to return to a brief simmer for exactly 2 minutes until the skin turns olive-drab.
Use a slotted spoon to transfer the hot vegetables tightly into clean glass jars. Pour the remaining hot syrup over the top, seal the lids, and allow them to cool on your counter before refrigerating.
Notes
The Sweetener Selection: Never substitute pure erythritol in this recipe. When stored in cold refrigerator conditions, erythritol will crystallize, leaving gritty white shards inside your jars. Slice Off the Tips: Always discard the ends of your cucumbers before pickling. The blossom end contains active enzymes that break down pectin, which will make your entire batch soft and mushy. Pickling Salt is Mandatory: Avoid using standard table salt for this recipe. Table salt contains added iodine and anti-caking compounds that will turn your clear pickle brine cloudy and gray. The 48-Hour Rest: While you can sample these pickles immediately, the flavor profile improves dramatically after sitting sealed in the refrigerator for 2 full days to let the spices marry. Keep Them Chilled: Because this is an easy refrigerator method rather than a hot-water bath canning setup, these pickles must live in the fridge. They stay crisp for up to 3 months.